DingTalk Integration
This document explains how to create an internal enterprise app and bot in the DingTalk developer console, then connect and verify the DingTalk integration in Flocks.
Prerequisites
Before you begin, confirm that the following requirements are met:
- You already have a DingTalk enterprise organization
- The current account is an administrator or sub-administrator of the enterprise
- You already have DingTalk developer access
- If the bot uses
HTTPreceive mode, prepare a publicly accessibleHTTPSaddress - If the app needs to call server-side APIs, prepare the server egress IP in advance
1. Create an Internal Enterprise App
Step 1: Create the App
Log in to the DingTalk developer console.
Click Application Development > Internal Enterprise Apps > DingTalk App > Create App.
Fill in the app information.
Configuration Item Required Description App name Yes Enter the app name. The minimum length is 2 characters. App description Yes Briefly describe the product or service provided by the app. The minimum length is 4 characters. App icon No Upload the app icon. The icon must be JPG/PNG, at least 240 px x 240 px, 1:1, no rounded corners, and within 2 MB. Click Save to enter the app details page.
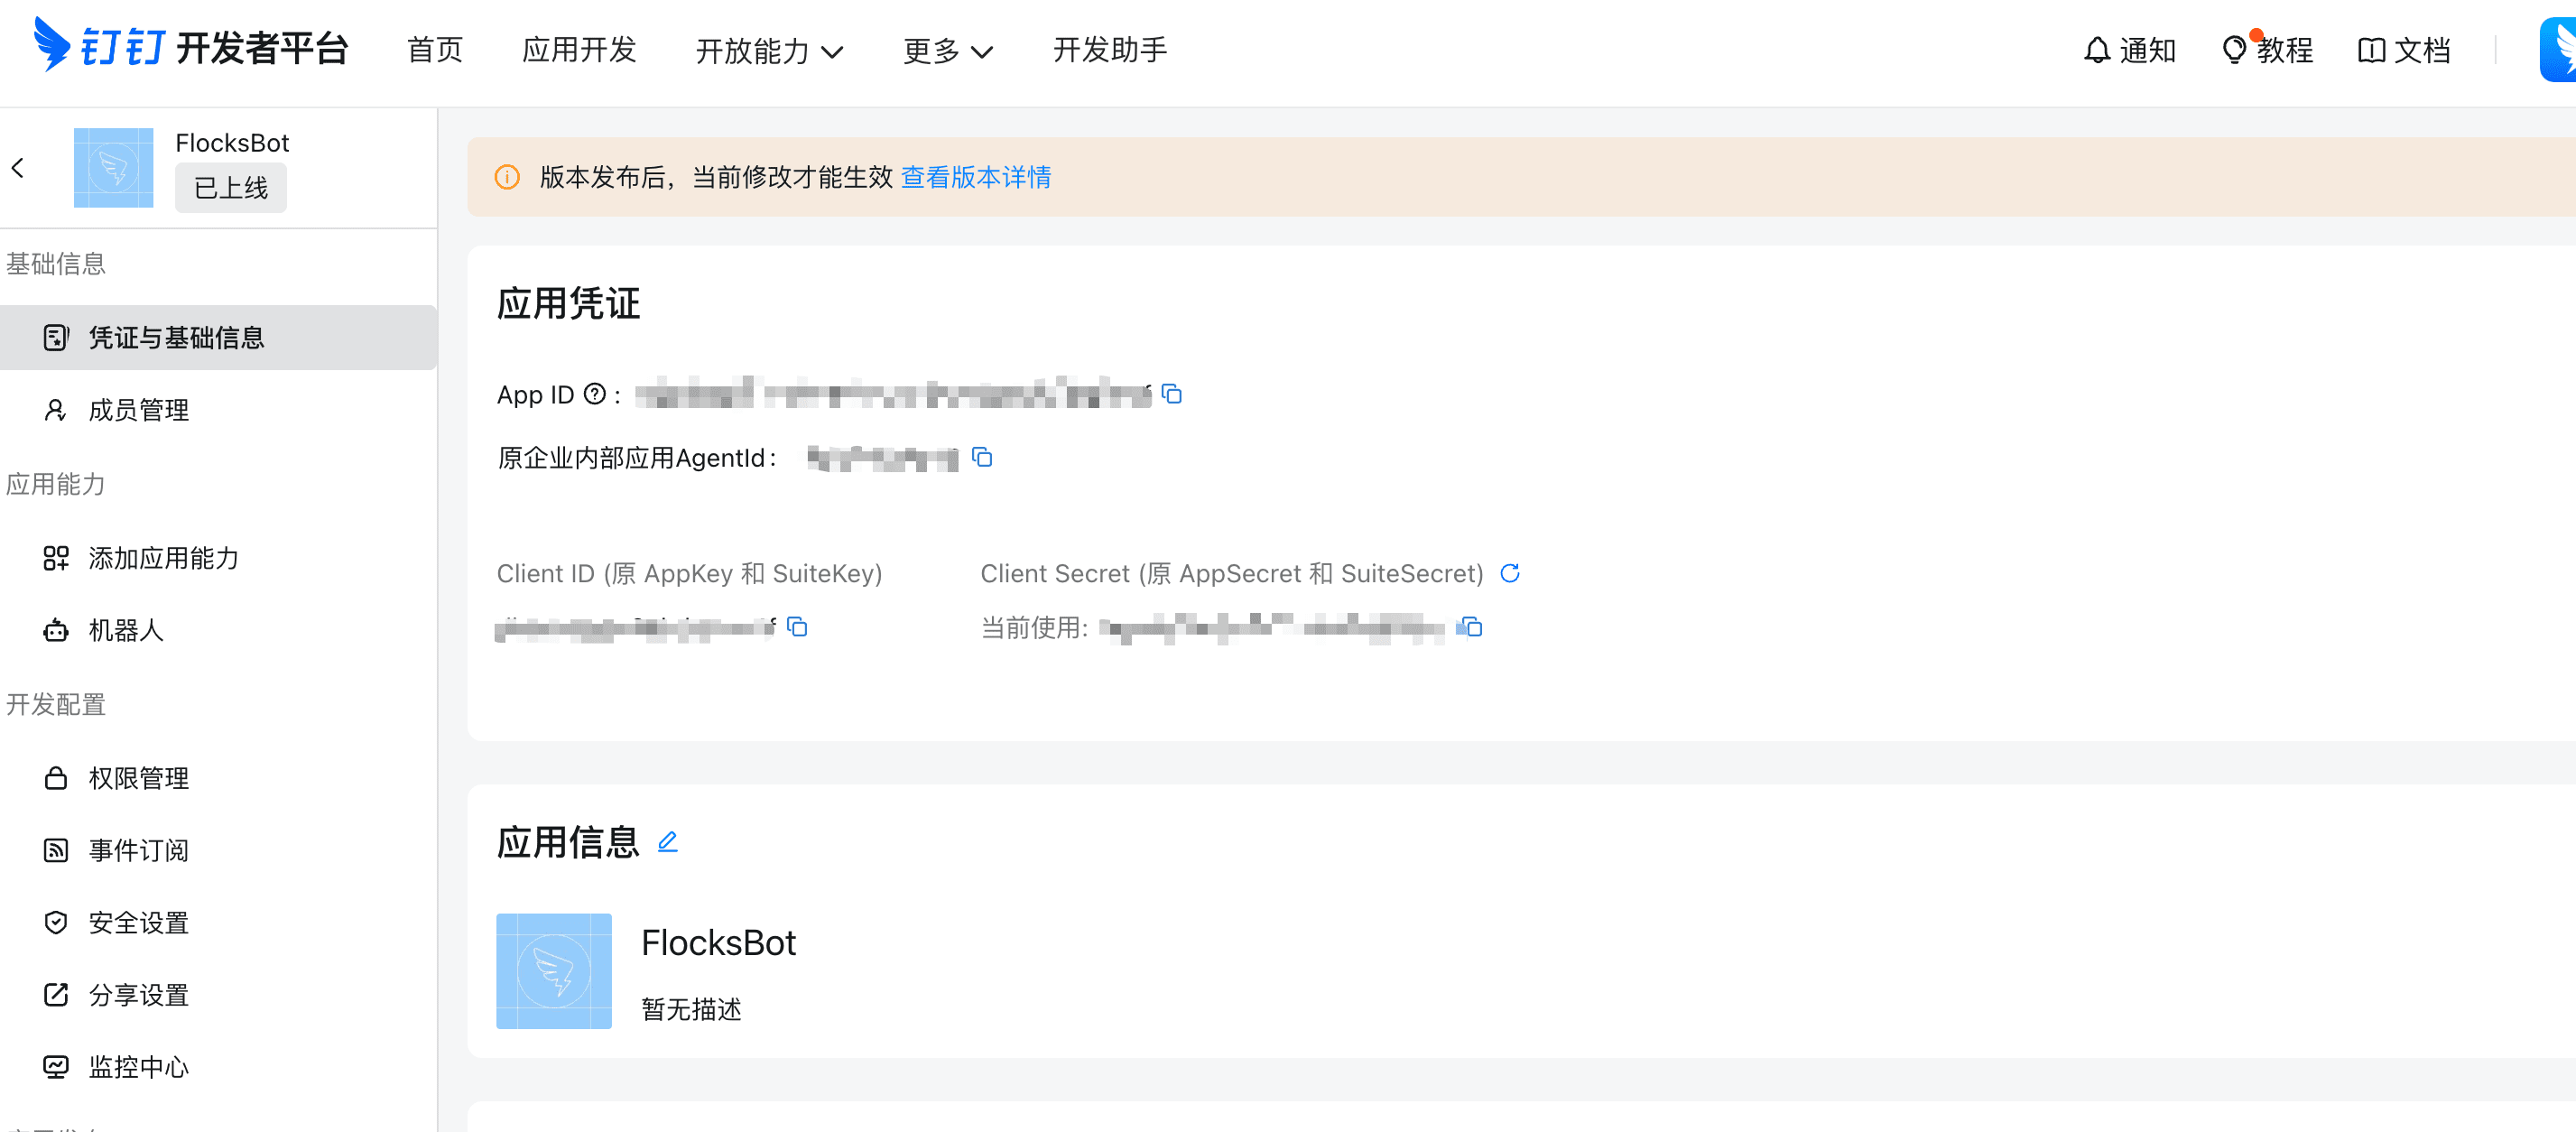
After creation, click Basic Information > Credentials and Basic Information to view the app credentials and basic information.
If you created the app earlier and need to find it, search by app name, creator, or similar information.
Step 2: Obtain Basic App Credentials
After creation, the app details page shows:
AppKeyAppSecret
These two parameters are typically used for server-side DingTalk API calls, password-free login, or other Open Platform integrations.
2. Create a Bot in the Internal Enterprise App
- Log in to the developer console, click the target app, and enter the app details page.
- Click App Capabilities > Bot and enable bot configuration.
- Configure the bot information.
- Click publish (save) for the bot.
3. Publish the App
After the bot is published, you must also publish the app it belongs to. Otherwise, employees cannot search for or use it normally.
Go to: Deployment and Release -> Version Management and Release
Click: Confirm Release
Notes:
- If no usable scope is configured, usually only the app creator can see it by default
- Configure the app visibility scope clearly before release
- The bot visibility scope stays consistent with the app visibility scope
4. Add the Bot to an Internal Enterprise Group
Step 1: Prepare an Internal Group
Create or select an existing group chat in the DingTalk client, and make sure:
- The group scenario is
Internal Group - The enterprise that owns the group is the same as the enterprise that owns the app
Step 2: Add the Bot
In the target group, click:
Group Settings -> Group Management -> Bots -> Add Bot
Find the bot you just published in the enterprise bot list and add it.
5. Configure and Verify the Flocks DingTalk Channel
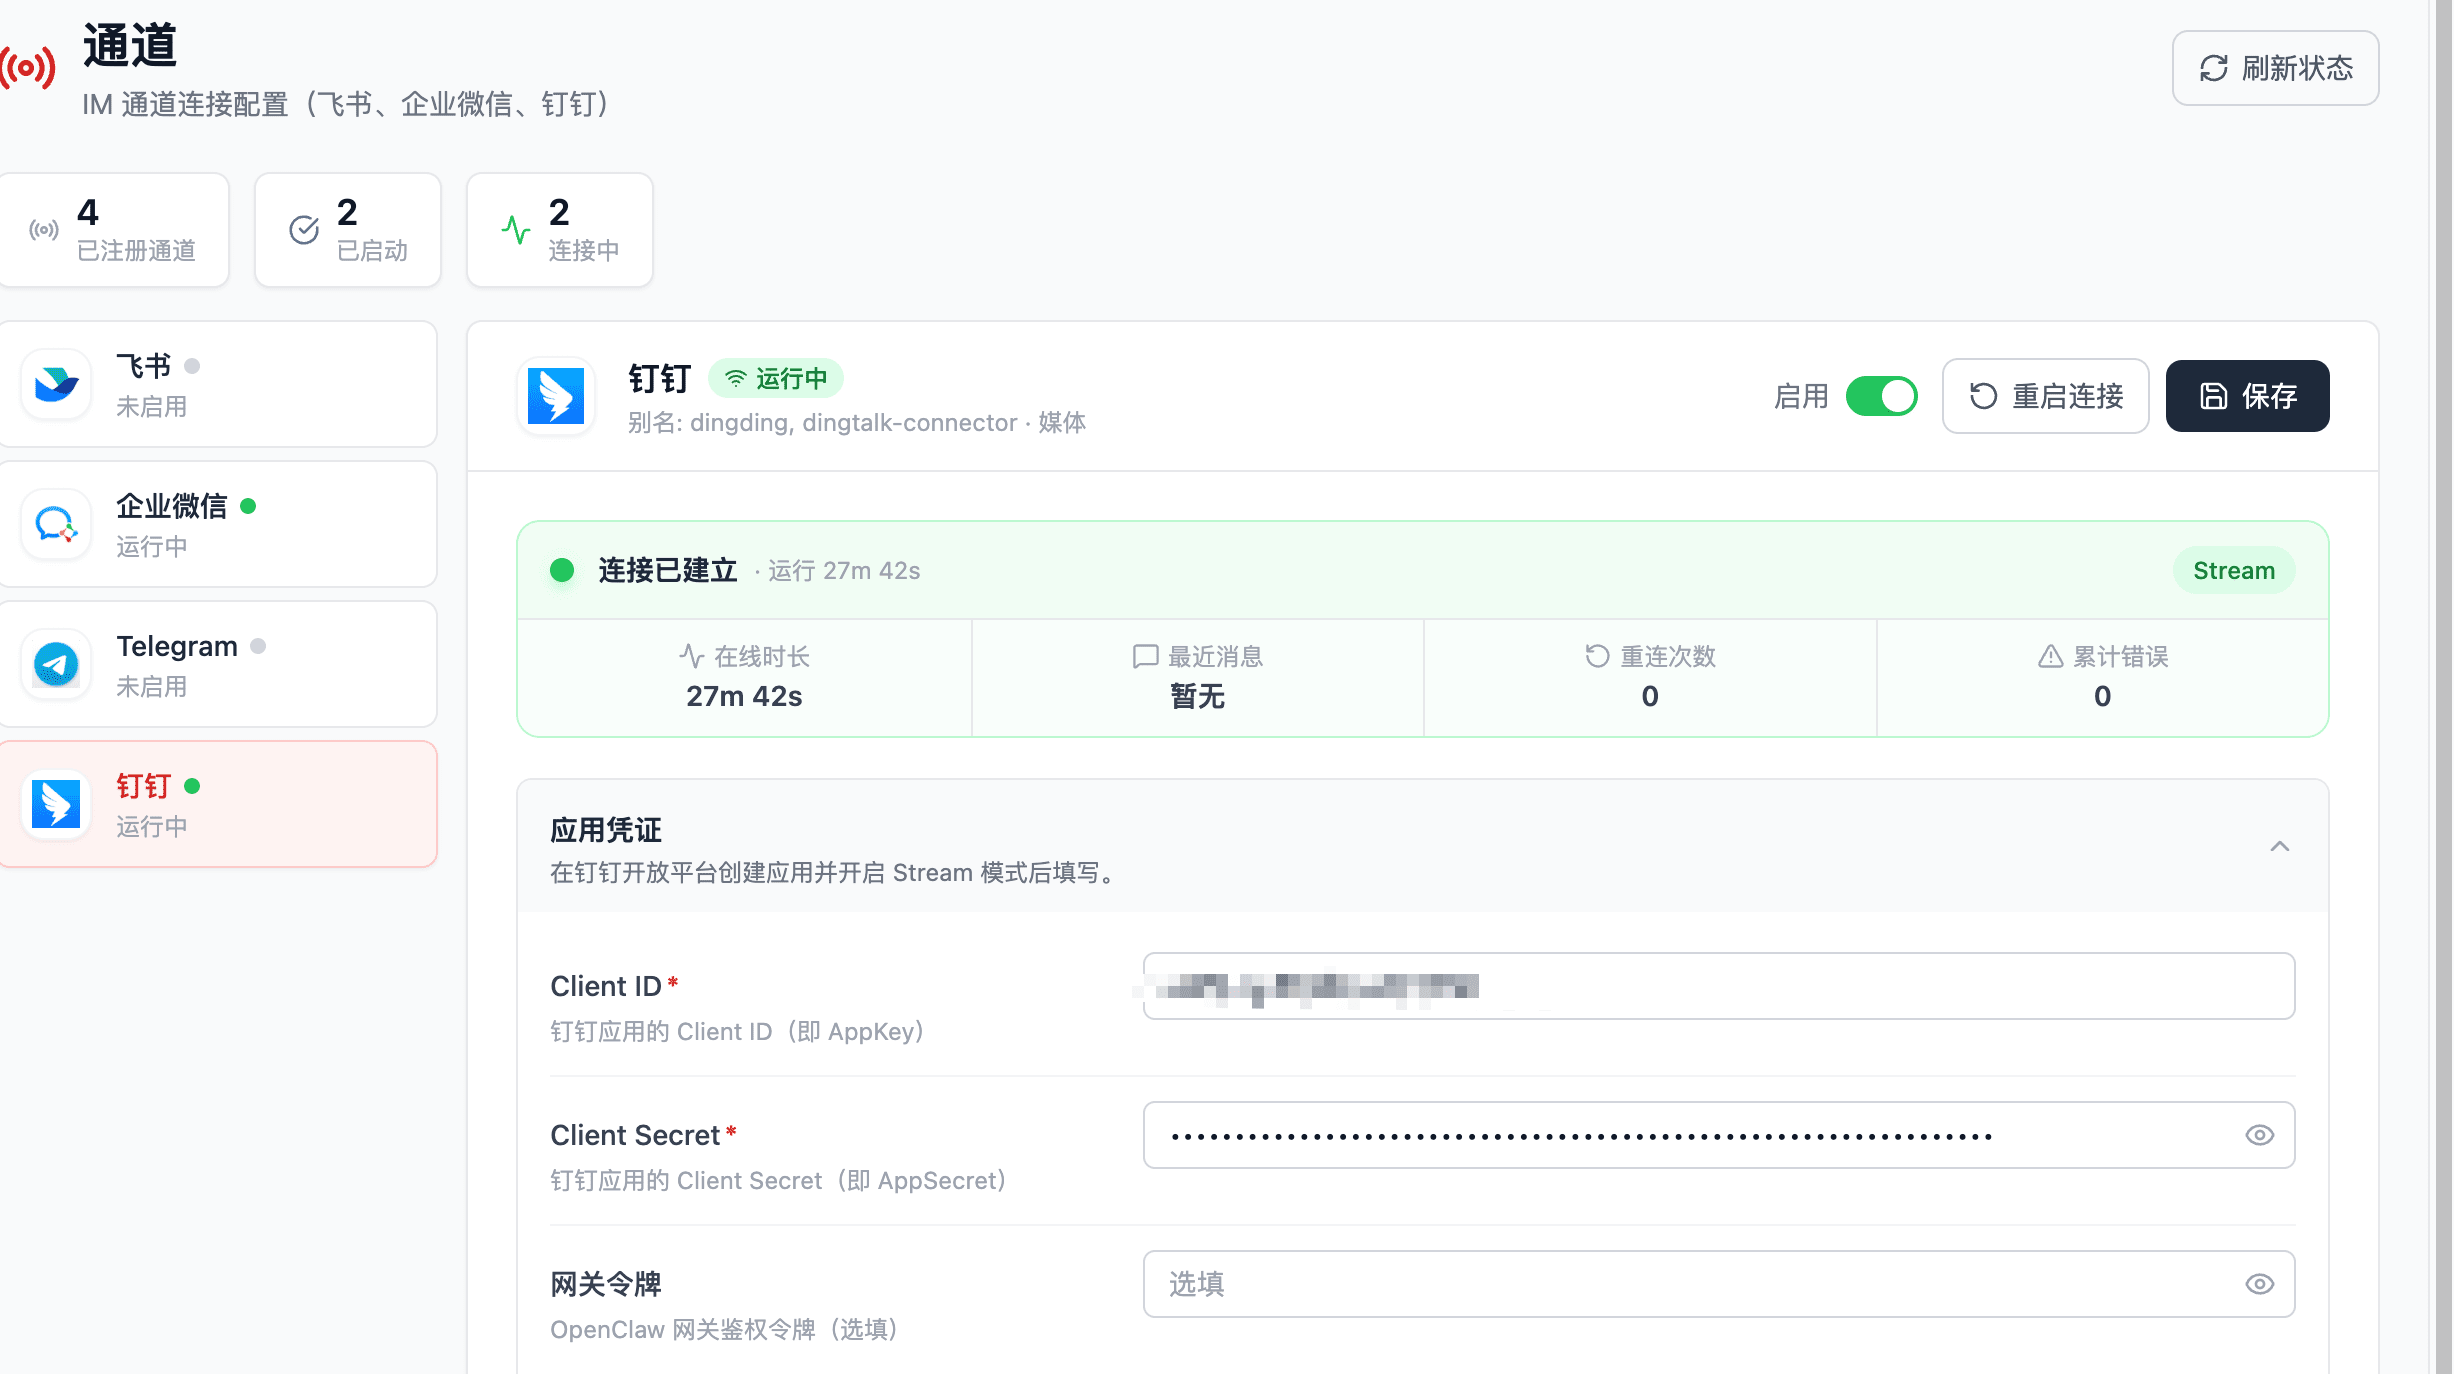
- Enter the
Client ID(that is,AppKey) andClient Secret(that is,AppSecret) obtained when creating the internal enterprise app into the DingTalk integration in Flocks, then save. - In the group chat,
@the bot, or send one direct message to the bot. Receiving a reply means the connection was established successfully.
6. Official References
This document mainly references the following official DingTalk documentation:
- Development process overview
- Create and publish your first H5 micro app
- Configure an enterprise bot
- Add a bot to a group
- Enterprise-created chatbot development
Related Resources: Messaging and alerting integrations overview | Feishu integration | WeCom integration | Slack integration | Telegram integration | WeChat integration | WhatsApp integration | Email integration configuration